Chimney Repair Guide: Leaks, Crowns & Rebuilds
Almost every chimney repair starts with water. This guide walks through where leaks actually begin, what a failed crown looks like, and how a full rebuild is done — using photos from real Memphis-area jobs, start to finish.
A Cap Will Not Save a Failed Crown
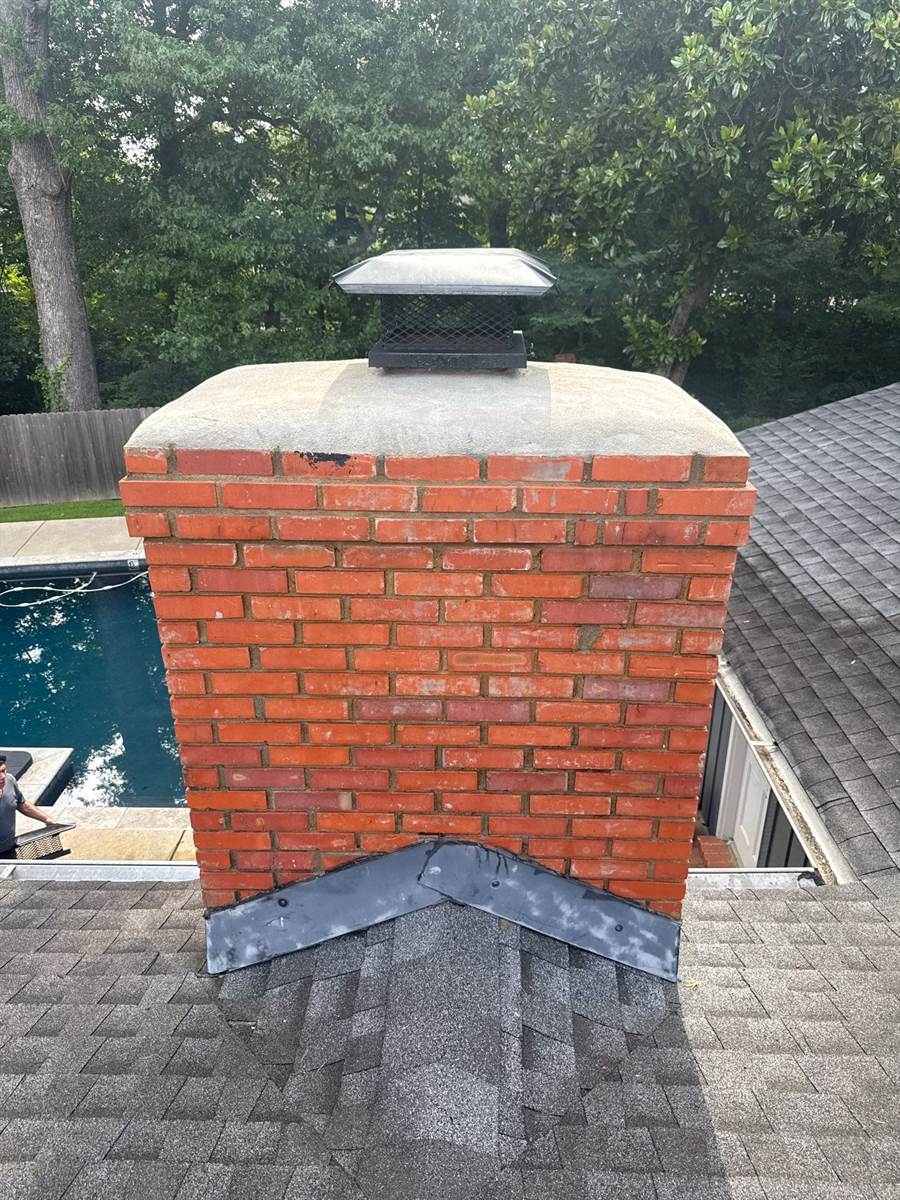
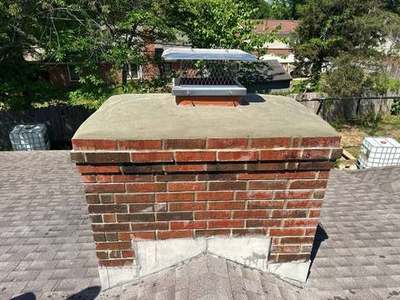
This chimney has a cap on it. It is still failing, and the photo shows exactly why.
The grey slab across the top is the crown — the concrete surface that is supposed to shed rain off the masonry. It has cracked through and started breaking away at the edge. Below it, the brick courses have shifted out of line and the joints have opened. That sequence is the whole story of chimney failure: the crown lets water in, the water freezes and thaws through a Memphis winter, and the brickwork underneath slowly comes apart.
The cap over the flue is doing its job. It just is not the part that failed — which is why "I already have a cap" never settles the question.
- Crown rebuilds in poured concrete, properly sloped
- Stainless caps with spark arrestors
- Flashing repair where the chimney meets the roof
- Partial and full rebuilds, above or below the roofline
- Color-matched mortar so the repair disappears
A Full Chimney Rebuild, Step by Step
This chimney had reached the point where patching was no longer honest work — the top courses had shifted, brick faces were breaking off, and the crown had cracked through. Here is the whole job, from the first drone photos in May to the finished stack in July.
Step 1. Find Out How Far It Goes
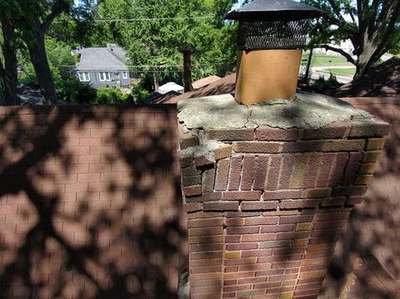
This is the drone's view of the whole stack before the job — and it is the photo that set the scope. From the ground you can see maybe the top third of a chimney. From the air you can read every mortar joint from the cap to the shoulders, the aging metal where the stack steps out at the roofline, and how far down the eroded joints actually run.
On this chimney the answer was: all the way. The joints were not just weathered at the top — they had washed out along the full face. That distinction decides everything. Weak joints near the crown is a small repair; joint failure down the whole stack means every joint gets rebuilt. We fly every chimney before quoting so nobody is guessing — and so you see what we see.
Step 2. Reinforce the Brick That Is Still Good
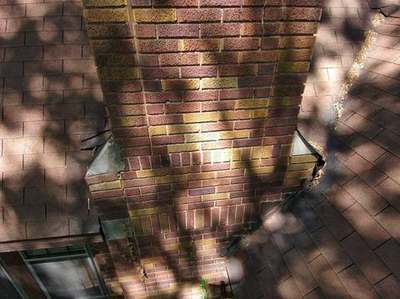
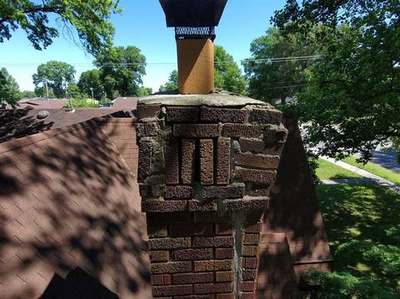
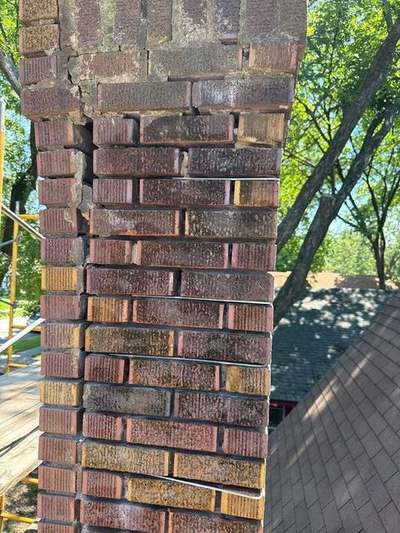
Not every course has to come down. On most chimneys we look at — this one included — the brick units themselves are still hard and sound. What failed is the mortar between them. Those are two very different problems, and they get two very different repairs.
You can also see in the photo where someone already tried to stop the damage with surface patchwork — the pale gray smears over open joints and cracked faces. That kind of smear does not replace washed-out mortar bond. It is a temporary cover, not a structural repair, and the stack kept coming apart underneath it.
Where the brick is still good, the answer is not a rebuild of every course. The joints get ground out and repointed with new, harder mortar, which reinforces the existing structure in place. Done properly the stack ends up tied together better than it was originally, without disturbing a single sound brick.
That distinction is also what keeps the bill honest. Tearing out good masonry costs you money and throws away original brick that is almost impossible to match. We rebuild only what is genuinely failed — and reinforce everything else.
Rebuild high, reinforce low
On this chimney the line fell at the shoulders. Above it the masonry came down and was re-laid. Below it, every joint was reground and repacked — no brick removed.
Step 3. Grind Out Every Joint, Put Steel In
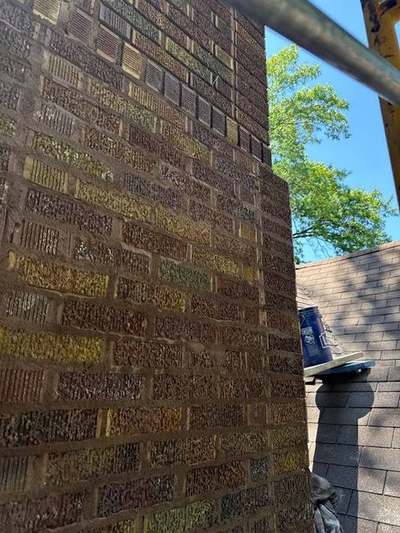
That regrinding is the part of the job you will never see from the street, and it is where the strength comes from. Every joint is cut back to full depth with a thick grinder blade — not scratched at the surface, not just raked where it is loose. Grinding that deep takes most of a day on a chimney this size, and it is the difference between tuckpointing that lasts decades and a smear of new mortar over old failure.
Then, before any mortar goes back, steel joint reinforcement is laid into the open joints. You can see it in the photo: the wire runs through the raked joints across the face of the stack. Fresh mortar is tucked over the top of it, burying the steel inside every joint. When the work is finished the wire is invisible — but the whole face of the chimney is tied together with steel, not just held by mortar bond.
Why the steel matters
Most older Memphis chimneys have nothing in their joints but mortar — and mortar alone is what failed here. Steel in every reground joint is the single biggest reason this repair outlasts the original masonry.
Step 4. Re-Lay the Top and Set the Flue
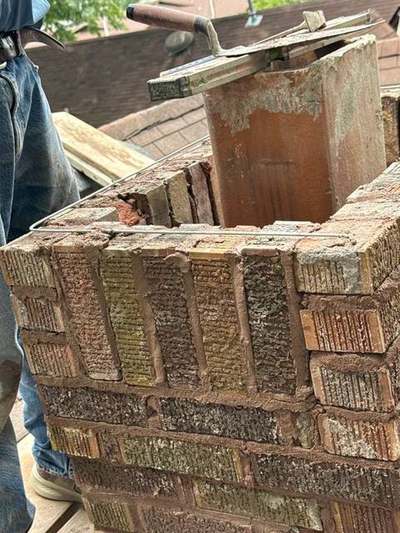
At the top, the brickwork is rebuilt around the clay flue liner, which must stand proud of the finished crown so exhaust clears the masonry. Look at the top course in the photo: a ring of steel reinforcement runs around its full perimeter, waiting for the next bed of mortar to lock it in. The crown will pour over a top course that is tied together with steel — the exact spot where this chimney failed the first time.
The liner gets checked while it is exposed — it is the only time you can see it properly without a camera, and a cracked liner is a safety problem, not a cosmetic one.
Every few courses get checked with a level in both directions. A chimney that is a half-inch out at the bottom is several inches out by the top, and there is no fixing it afterward.
- Original brick cleaned and reused where sound
- Liner inspected while the top is open
- Courses levelled in both directions as they rise
- Joints struck to match the original profile
Step 5. Pour the Crown, Set the Cap
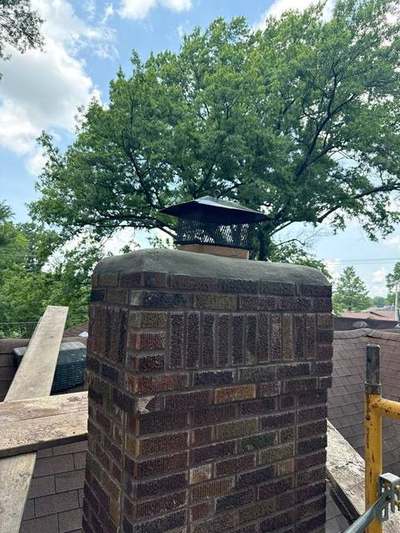
The crown is the part everyone skips and everyone regrets. A proper crown is poured concrete, not the thin smear of mortar most chimneys leave the builder with. It is sloped so water runs off, and it overhangs the brick with a drip edge so runoff falls clear of the masonry instead of down the face of it.
A stainless cap goes on last. It keeps rain out of the flue, keeps birds and squirrels out of your firebox, and acts as a spark arrestor on the way out.
Those two items are why this chimney will not be back on our schedule in five years.
The Same Chimney, Repaired in Four Days
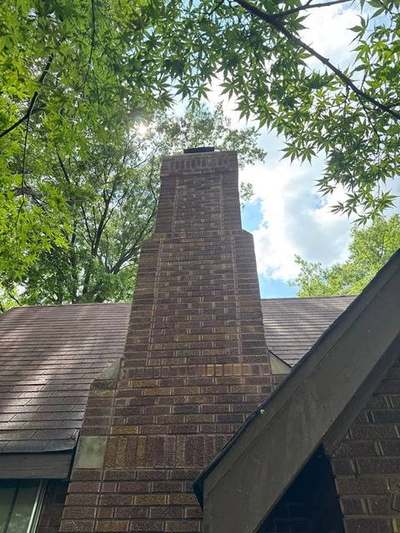
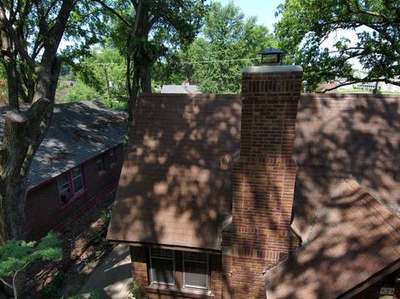
Chimney showing any of this? The look is free and the assessment is honest.
Chimney Crowns & Caps
The crown is the sloped slab across the top of the masonry. The cap is the metal cover over the flue opening. They are different parts with different jobs, and together they are the single most common place a chimney starts to leak.
What a Failed Crown Looks Like
A crown fails from the middle out. Water sits on the flat, freezes, and opens hairline cracks into real ones. Chunks break free. Eventually you can see daylight into the brickwork below, and every rain runs straight into the top of the stack.
From the ground you will almost never see it — which is exactly why crowns get ignored until the damage shows up as stains on a bedroom ceiling. This is the case for a drone photo with every estimate.
Related: masonry leak repair · chimney inspection · efflorescence explained
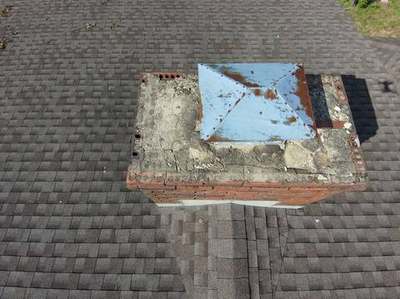
Tear-Out to Poured Crown, Same Day
On a chimney whose brickwork is still sound, the crown alone can be replaced without touching the stack below it.
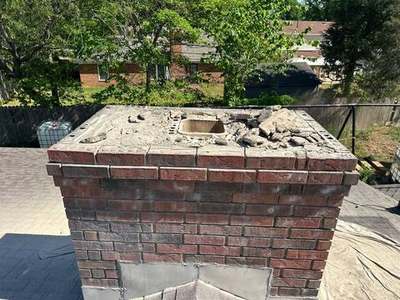
Crown vs. cap — they are not the same thing
The crown is masonry: the concrete slab that sheds water off the top of the brick. The cap is metal: the cover over the flue opening itself. A chimney can have a perfect cap and still leak badly through a failed crown, which is why "I already have a cap" does not settle the question.
Repair or Rebuild?
This is the question worth getting right, because the price difference is large and the wrong answer wastes your money either way.
A repair is usually enough when the brickwork below the damage is still sound and bonded, the mortar joints hold up to a scrape test, and the problem is confined to the crown, the cap, or the flashing. That is a targeted job on a good chimney.
A rebuild is the honest answer when courses have shifted out of plane, brick faces are spalling off in sheets, cracking runs down the stack rather than just across the crown, or the mortar has gone soft enough to rake out by hand. At that point the masonry has lost its bond, and anything laid on top of it is temporary.
Rebuilds are also not all-or-nothing. Most are above the roofline — the section that takes the weather — leaving the sound masonry below untouched. That is a fraction of the cost of taking a chimney down to the firebox, and it is what the job in this guide required. Work below the roofline — firebox, smoke chamber, damper and flue relining — is a separate scope from anything on this page.
What we will tell you
If your chimney needs a crown and not a rebuild, we will say so — that is a far smaller invoice, and we would rather have the referral. Every estimate comes with drone photos so you are looking at the same evidence we are.
How Chimney Repair Works
- Inspect from the air and the roof, and photograph what we find.
- Identify the actual water entry point — crown, cap, flashing, or joints.
- Scope the work honestly: crown only, partial rebuild, or above-roofline rebuild.
- Set scaffolding for safe, level access at every working height.
- Grind failed joints out to full depth; take damaged masonry down to sound brick.
- Lay steel reinforcement into the joints and courses, then tuck and re-lay with color-matched mortar.
- Pour a sloped crown with a drip edge and set a stainless cap.
- Seal the flashing at the roofline and clean up the site.
Related work
Water showing up inside? See masonry leak repair. Open joints elsewhere on the house? See tuckpointing. Wood-framed chase instead of brick? See wooden chimney chase repair. Creosote or a flue that will not draw? That is chimney sweeping, not masonry. More finished jobs in the project gallery. Full menu on chimney services.
Chimney Repair Questions
Look at where the damage is. If it is confined to the concrete slab on top, that is a crown replacement. If brick courses have shifted, faces are flaking off, or cracking runs down the stack, the masonry has lost its bond and needs rebuilding. We photograph the top with a drone so you can see which one you have.
The crown is the sloped concrete slab that covers the top of the brickwork. The cap is the metal cover over the flue opening itself. A chimney can have a good cap and still leak through a cracked crown.
Yes, and that is the most common chimney rebuild we do. The section above the roofline takes nearly all the weather, so it usually fails first while the masonry below stays sound. Rebuilding only that portion costs a fraction of a full-height rebuild.
That is the standard we hold ourselves to. Original brick is cleaned and reused wherever it is still sound, mortar is mixed to match the original in color and strength, and decorative details like corbelled banding are rebuilt as they were.
Often, yes. Crown and flashing leaks both show up inside exactly like a roof leak, and they are frequently missed during a reroof. An inspection identifies the real entry point before anyone spends money on the wrong repair.
Yes. Madewell backs chimney rebuild, crown and cap workmanship with our 10-year guarantee.
Ready to Protect Your Home? Let's Talk.
From a crumbling chimney to a hairline mortar crack, Madewell Masonry gives you an honest assessment and a fair price — backed by 40+ years of experience and a 10-year guarantee on our workmanship.